Photoshop Keyboard Shortcuts - Tips & Resources In this tutorial I'll show you how to use Photoshop CS and CS2 to change your keyboard shortcuts, how to save sets of customized keyboard shortcuts, and how to print out your customized sets. If you have an earlier version of Photoshop, at the end of the tutorial you'll find some helpful tips and a list of sites where you can download collections of Photoshop shortcuts in PDF form.
How To Change Photoshop Keyboard Shortcuts (CS & CS2 Only) 
To create your own shortcuts in Photoshop CS or CS2, go to the
Edit Menu and select
Keyboard Shortcuts. The Keyboard Shortcuts dialog box serves as a shortcut editor, and includes all the commands that support shortcuts.
To modify the keyboard shortcuts you'll have to create a new keyboard shortcut set by clicking on the
New Keyboard Set button (the icon to be clicked is immediately to the left of the trash can icon). You'll then be asked to name and save your shortcut set.
Now select a heading from the dropdown menu on the left that says
Shortcuts For. This allows you to view all of the Photoshop commands in either the
Application Menus, the
Palette Menus, or the
Tools.
Once you've selected a heading you can search through the contents to locate the command you’d like to change or create a shortcut for. Commands that already have shortcuts will be indicated in the menu. You can change these if you’d prefer by clicking on the shortcut, typing in a new shortcut, and pressing
Accept at the top right side of the dialog box.
To make a totally new shortcut, click on the blank space beside the menu command and type in the shortcut you’d like to use. To save it click on the
Add Shortcut button.

The hardest part here is finding a key combination that's not already taken. Even the Keyboard Shortcut command has a shortcut (it's Shift-Option-Command-K for Mac and Shift-Alt-Ctrl-K for Win).
How To Remove Shortcuts From A Command Or A Tool Choose
Edit> Keyboard Shortcuts. In the Keyboard Shortcuts dialog box, select the command or the tool name whose shortcut you want to delete, and then click
Delete Shortcut.
How To Delete A Set Of Shortcuts Choose
Edit> Keyboard Shortcuts. In the
Set pop-up menu, choose the shortcut set that you want to delete. Then click the
Delete icon (or the
Delete Shortcut button), and
OK to exit the dialog box.
Create Project-Specific Custom Workspaces (CS2 Only) 
Photoshop lets you create custom workspaces that display just the palettes you need for a specific project, and in CS2 a new customized workspace can also include one of your keyboard shortcut sets.
Choose
Window> Workspace> Save Workspace. The option is listed under
Capture. Just click on
Keyboard Shortcuts and the active set will be saved with the new customized worskspace.
Context-sensitive Menus (they live in your mouse...!) In addition to using keyboard shortcuts, you can also access many commands using context-sensitive menus. Context-sensitive menus only display commands that are relevant to an active tool, a selection, or a palette. To display a context-sensitive menu, right-click (Win) or Control-click (Mac) in a document window or palette.
For example, when you have a file with layers, clicking on the document in this way will bring up a contextual menu filled with layer options. This saves you a trip to the palette flyout.
Save Them, Print Them, Learn Them To print your keyboard shortcuts, go to
Edit, Keyboard Shortcuts and
click
Summarize. Photoshop will then save your shortcuts to an html document that can be opened in any text editor or web browser. From there you can print a copy to keep as a reference. Sweet.
Photoshop 6 Shortcuts & Photoshop 7 Shortcuts Although the option of creating your own shortcuts is only available in the latest versions, don't despair. In earlier versions many of the commands already have their own shortcuts set in the program. To learn more about these, go
Help> Photoshop Help to launch the Photoshop Help pages.
In Photoshop 7 or lower, you can find the shortcut commands in the Help menu's table of contents on the left-hand side of the page. Just scroll down to the very bottom. Macintosh and Windows each have their own index, and offer slightly different shortcuts for the same commands. Click on any of the headings and you'll be given a list of available shortcuts.
Since the help pages are launched in a browser, you also have the option of printing these pages to use as a reference guide.
Get Your Free Photoshop Shortcuts PDFs...Photoshop expert Trevor Morris offers
an assortment of free Photoshop Keyboard Shortcuts PDF files. You'll find the following:
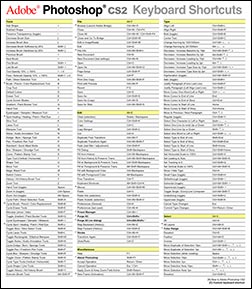
Adobe Photoshop CS3 - Keyboard Shortcuts Cheat Sheet (July 6, 2007)
All keyboard shortcuts organized into four pages, by menu, as well as alphabetically by key.
- Keyboard Shortcuts Presets (June 23, 2007)
This keyboard shortcuts (KYS) file includes dozens of extra shortcuts for commonly used commands (all documented in the above cheat sheet). Installation instructions are included in the ZIP file.
 Shortcuts For Photoshop CS2 - PDF
 - Photoshop CS2 keyboard shortcuts organized into four pages, by menu commands and by key (alphabetically).
- Mac version of the above Photoshop CS2 keyboard shortcuts.
- Photoshop CS2 Keyboard Shortcuts (KYS), Menu Customization (MNU) and Workspace files, containing many additional shortcuts. 100% compatible with default keyboard shortcuts. All detailed in the above PDF.
Shortcuts For Photoshop CS - PDF - Photoshop CS keyboard shortcuts organized into two pages (ideal for laminating as a two-sided reference). Page 1 organized by commands, page 2 by keys.
- Mac version of the above Photoshop CS keyboard shortcuts.
- Photoshop CS Keyboard Shortcuts (KYS) file containing many additional shortcuts. 100% compatible with default keyboard shortcuts. All shortcuts available in the above PDF.
Shortcuts For Photoshop 7 - PDF - Photoshop 7 keyboard shortcuts organized into two pages (ideal for laminating as a double-sided reference). Page 1 is organized by commands, and page 2 is organized by keys.
- Mac version of the above Photoshop 7 keyboard shortcuts.
Shortcuts For Photoshop 6 - PDF - Two page Photoshop 6 keyboard shortcuts.
- Two page Photoshop 6 keyboard shortcuts for the Mac.
Shortcuts For Photoshop 5 - PDF - Photoshop 5.x keyboard shortcuts. Page 1 is organized by keys, and page 2 is organized by commands.
Free Default Tool Palette Chart With Keyboard Shortcuts (PS CS3) Below you'll also find a graphic from Chapter 2 of
Photoshop CS3 Channels And Masks Bible. This is the Photoshop CS3 Default Tool Palette (with all the flyouts showing - along with their keyboard shortcuts). Photoshop CS3's tool palette displays the icons for 22 different tools in a tall, vertical palette. Some of the tool icons expand to access tools that are not visible, bringing the entire number of tools to 58 plus paint swatches, Quick Mask icons, and the view modes. Click the small black arrow on the lower right of the tool icon to display the additional related tools in a flyout menu. Thanks to our friends at Wiley for the free chapter and the free tool palette chart. And here is a direct link to the graphic for the
Photoshop CS3 Default Tool Palettes Chart, so you can print it out.
Shortcuts For Adobe Bridge and Camera Raw 3 The keyboard shortcuts for Adobe Bridge and Camera Raw 3 are available from
PhotoshopNews (courtesy of Ian Lyons, Computer-Darkroom).
Power Shortcuts PDFs From The Adobe Evangelists Site There are some
free PDFs of Photoshop Shortcuts by Julieanne Kost & Daniel Brown that you can download from the Adobe Evangelists site. Look for:
Photoshop CS2 - Power Shortcuts 
From the PDF: "In Photoshop CS2, many of the shortcuts for the application menus, palette menus and tools can be customized using the Keyboard Shortcuts editor. Although this document mentions some of the more common editable shortcuts, it also provides additional functionality only accessible through using keyboard modifiers which can't be changed through the Keyboard Shortcut editor."
To help organize the document, it is subdivided into the following 6 categories: The Tool Palette, Navigating the Work Area, Palette Shortcuts, Adobe Bridge, Camera Raw, and Grab Bag (everything else).
You'll also find Power Shortcuts for Photoshop CS and Photoshop 7, as well as some other really good goodies.
Time To Control-W (Mac: Command-W) This TutorialThere are so many 'hidden' features in Photoshop that can only be accessed through the shortcuts that I think the software engineers purposely added them as little rewards to create a treasure hunt for those of us who take the time to dive deeper into this amazing program.
Now go and study the shortcuts, because, as Trevor Morris says, "Keyboard shortcuts can not only improve your efficiency in Photoshop, but they can even provide you with functionality that might not be available by any other means."
And make sure to create a shortcut for having fun. That's essential!


 8) Getting the Chrome Look
 The End